
10-Step Guide to the Cloud Stop Motion Organization Console (for Schools & Educators)
Getting Started with the Cloud Stop Motion Organization Console
If you're managing a class, school, or organization using Cloud Stop Motion, the Organization Console serves as your central hub for user management, project oversight, and license control. Whether you're onboarding new students or monitoring storage usage, the Organization Console provides the tools you need.
This guide outlines the key features of the Organization Console and offers practical steps to help you manage your users and projects effectively.
Accessing the Organization Console
If you haven't created an account yet, follow this guide: How do I create a school/organization account?
After logging into Cloud Stop Motion, click your profile icon in the top-right corner and select "Organization Console". From here, you can manage users, projects, permissions, and settings.

1. Choosing Login Methods: SSO vs. Username/Password
Before setting up users, decide on the login method:
Single Sign-On (SSO)
Students and staff can sign in using their Google or Microsoft accounts, which is ideal for institutions utilizing these platforms.
Benefits:
-
No passwords to manage
-
Seamless integration with school systems
To implement SSO, create users with their school email addresses. Upon login, they'll be prompted to join your organization.
Username/Password
Best for:
-
Younger students without email addresses
-
Shared device environments
-
Institutions not using Google/Microsoft accounts
These accounts can be created manually or in bulk, and users will log in with the credentials you provide.
You can mix both login types within one organization.
2. Creating and Managing User Accounts
To learn more: Adding Users to a Cloud Stop Motion Organization account
You can set up student, teacher, or admin accounts using various methods:
-
Auto-Enroll Links: Generate unique enrollment links for users to join your organization.
-
CSV or Excel File Upload: Bulk import user information.
-
Manual Entry: Add users individually.
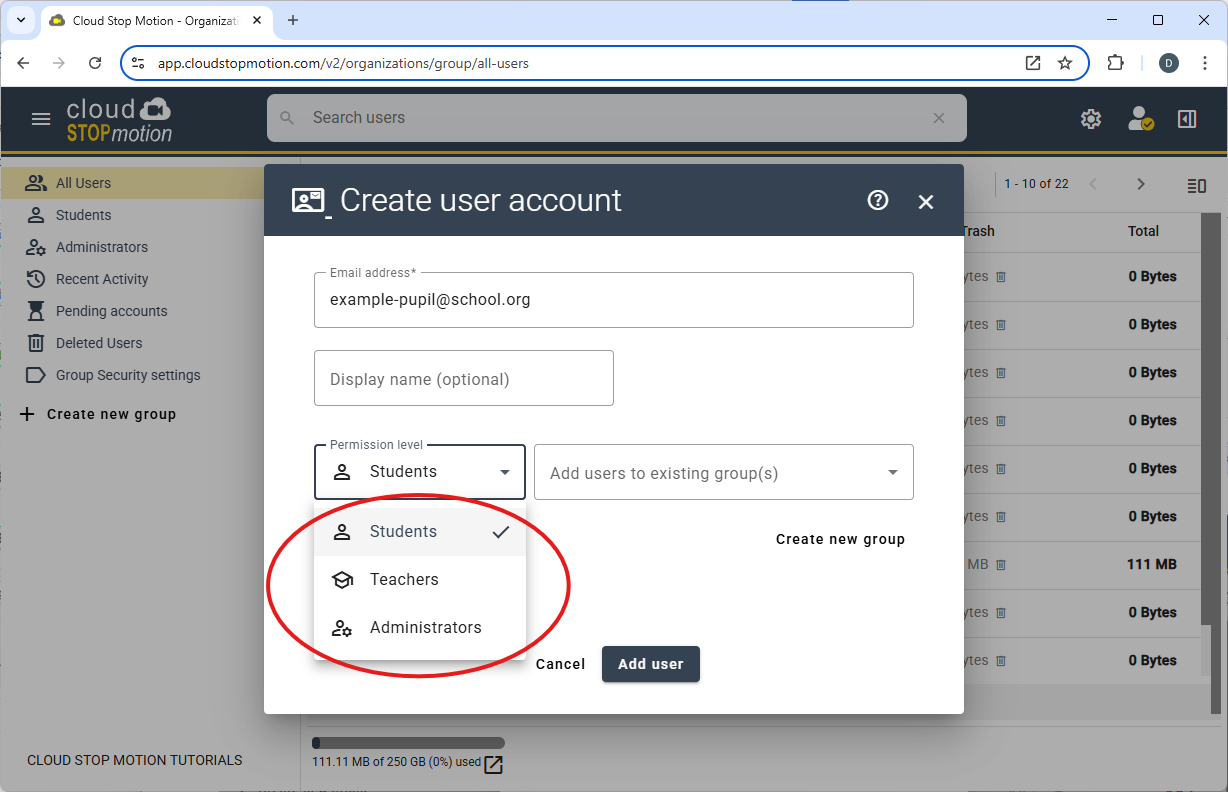
Each user is assigned a role: Student, Teacher, or Admin.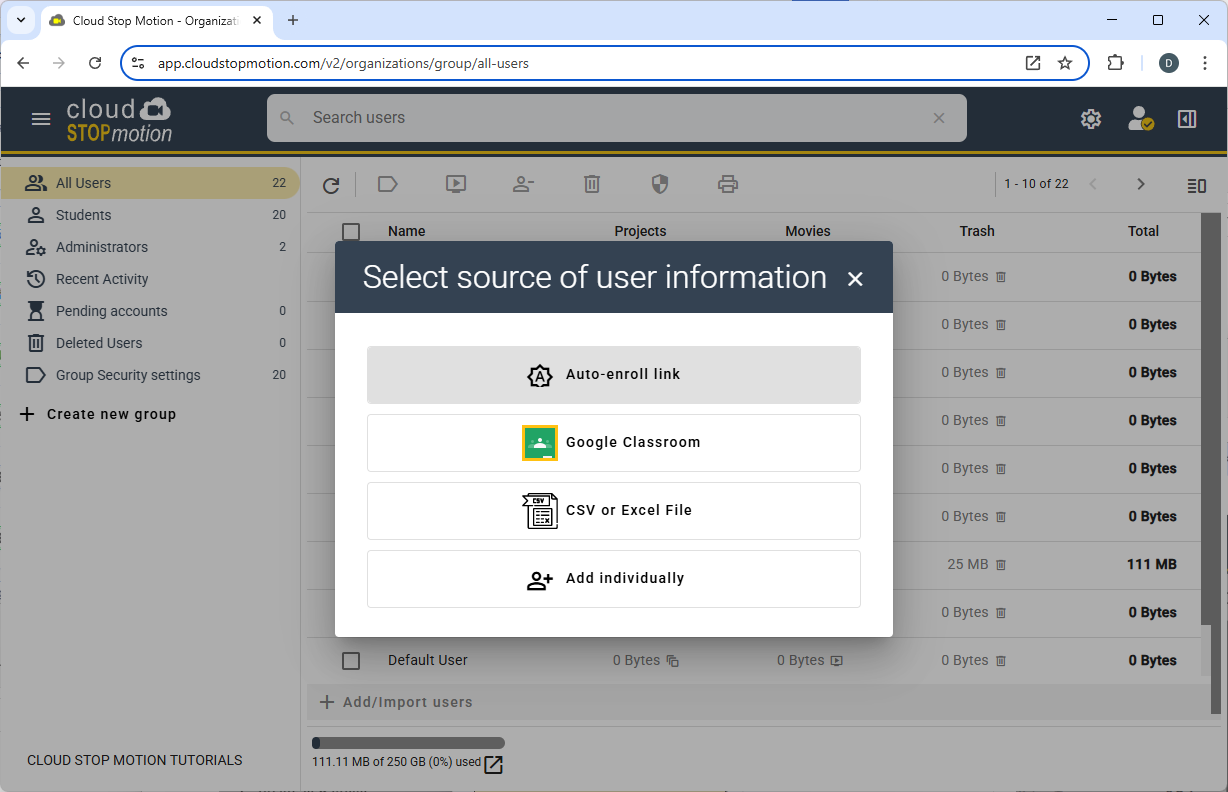
3. Understanding User Roles
See also: Student Account Types
-
Students: Create and manage their own projects without access to others' work.
-
Teachers: View and manage student projects but cannot alter global settings.
-
Admins: Have full control over users, storage, projects, and organizational settings.
Roles can be adjusted at any time via the Users tab.
4. Managing Access, Passwords, Roles, and Permissions
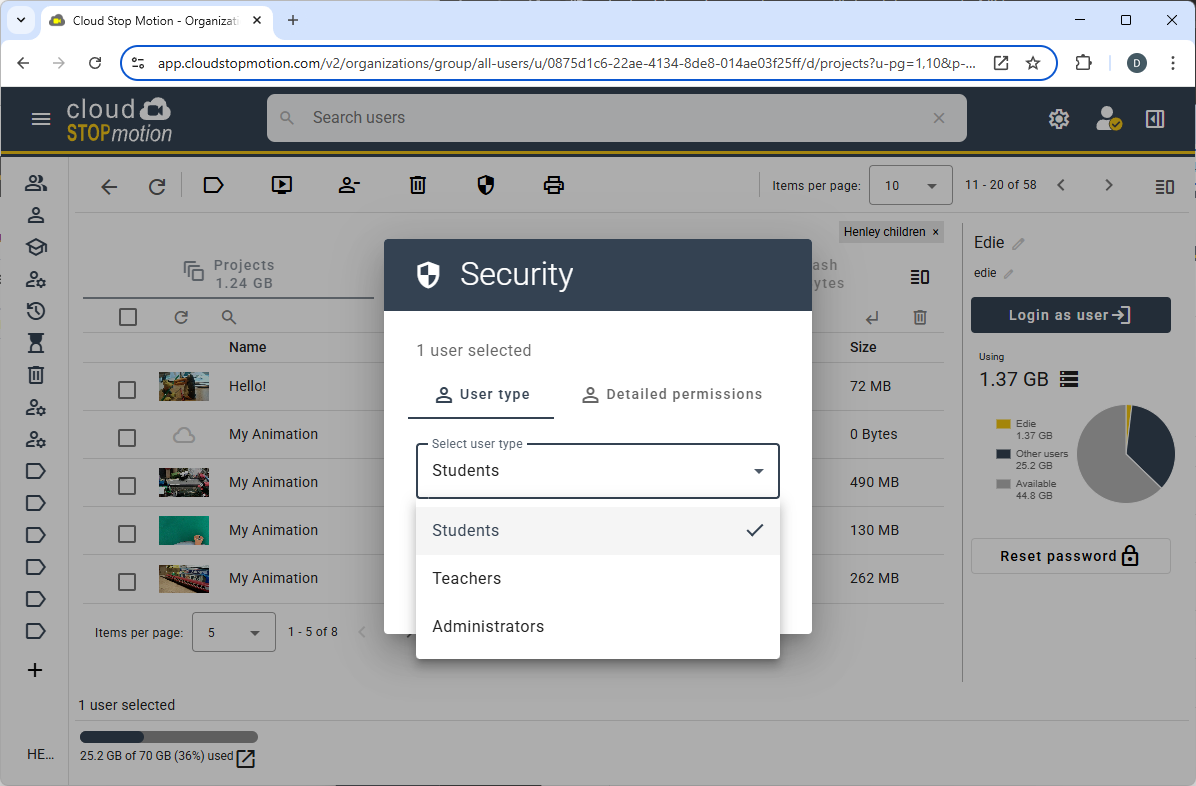
Resetting Passwords
For username/password users only. Admins can reset passwords directly in the console.
Not available for SSO users (Google/Microsoft). Their passwords are managed through their school accounts.
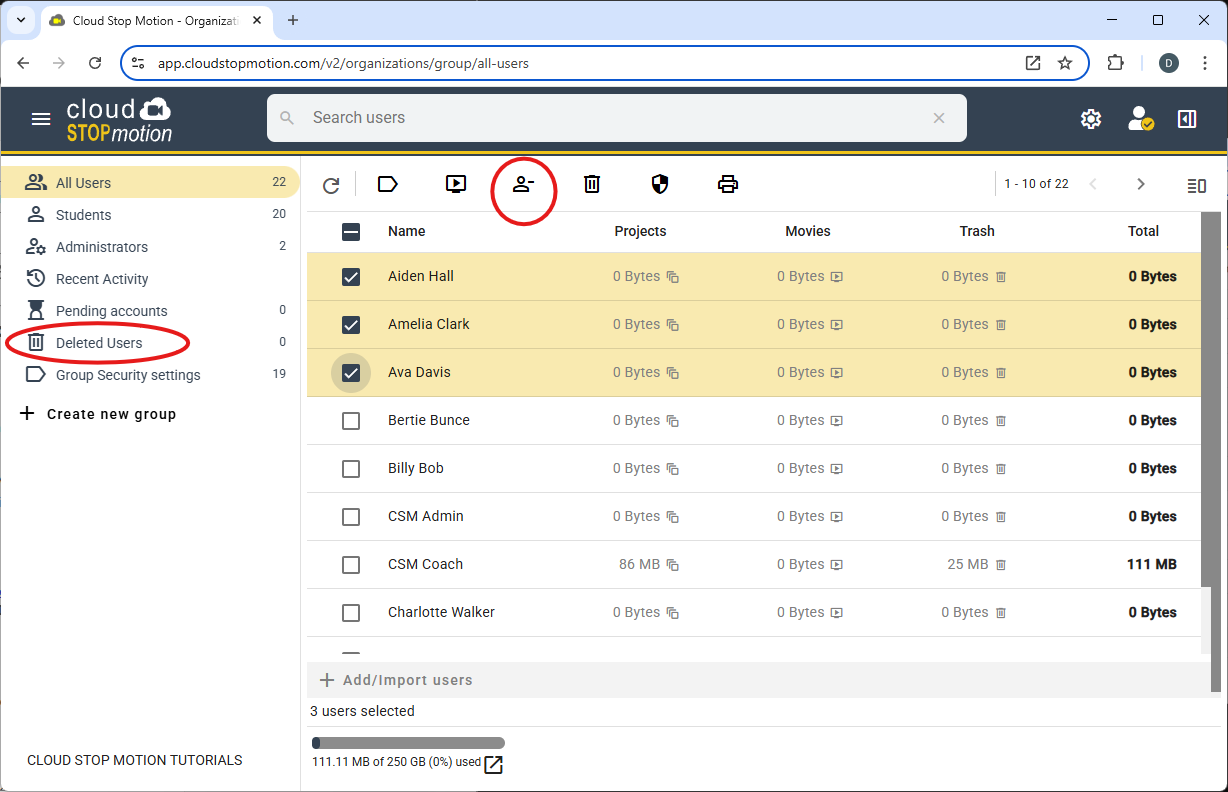
Removing Users
For more details: How do I remove users from my organization account? Removed users are moved to the Deleted Users folder. You can:
-
Restore them later
-
Permanently delete them (this deletes all their projects and data)
Adjusting Roles
You can reassign any user to Student, Teacher, or Admin.
Controlling Student Permissions
Student permissions include:
-
Login access
-
MP4 downloads
-
Changing display name
-
Receiving emails
-
Emptying recycle bin
-
Deleting project restore points
Each permission can be set to Deny, Allow, or Inherit from group/organization settings.
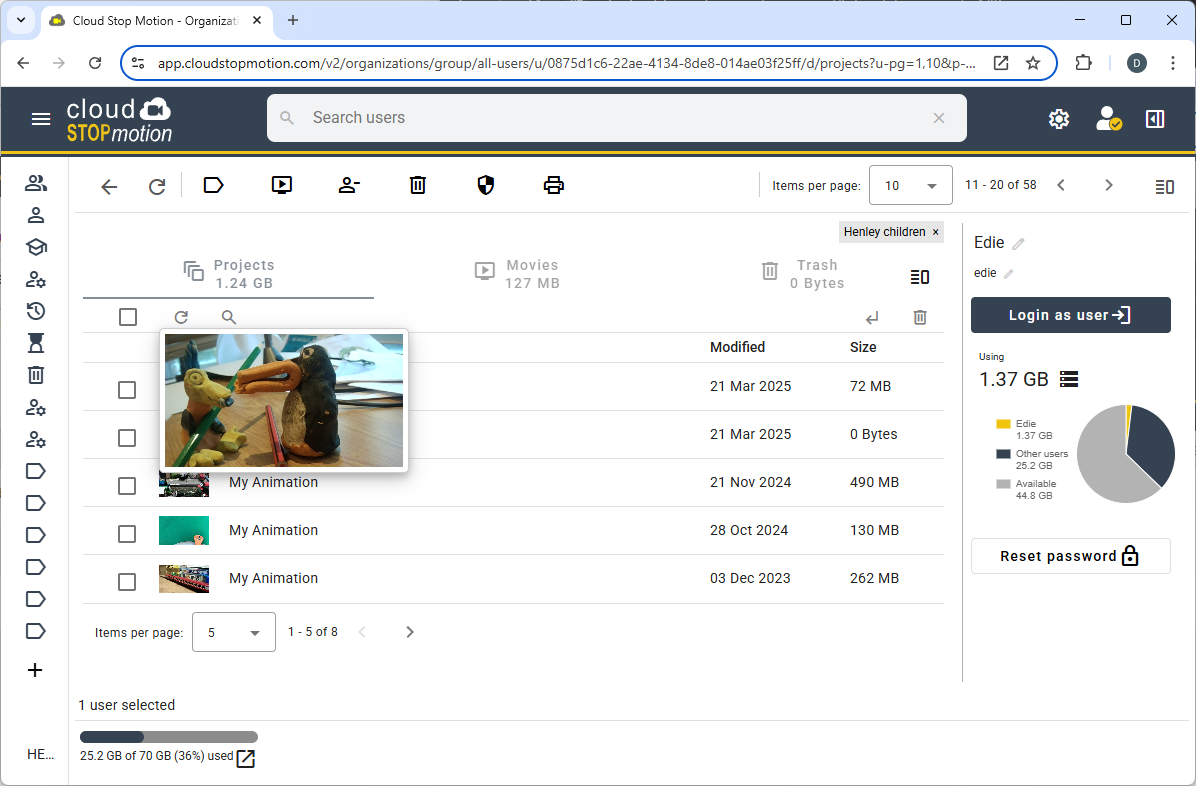
5. Managing Projects
Admins and teachers can:
-
View student projects
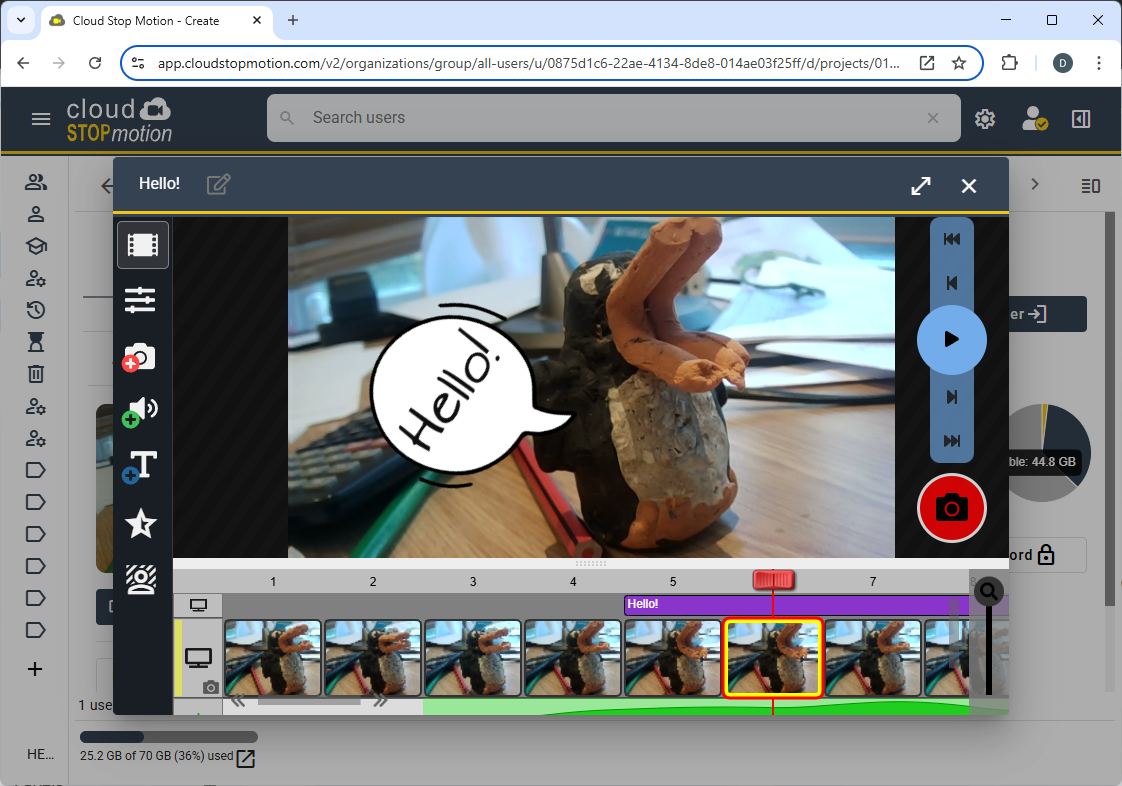
-
Edit projects directly to troubleshoot or tweak animations
-
Download or delete projects
- Export projects to MP4 movies
-
Log in as a user to see exactly what they see
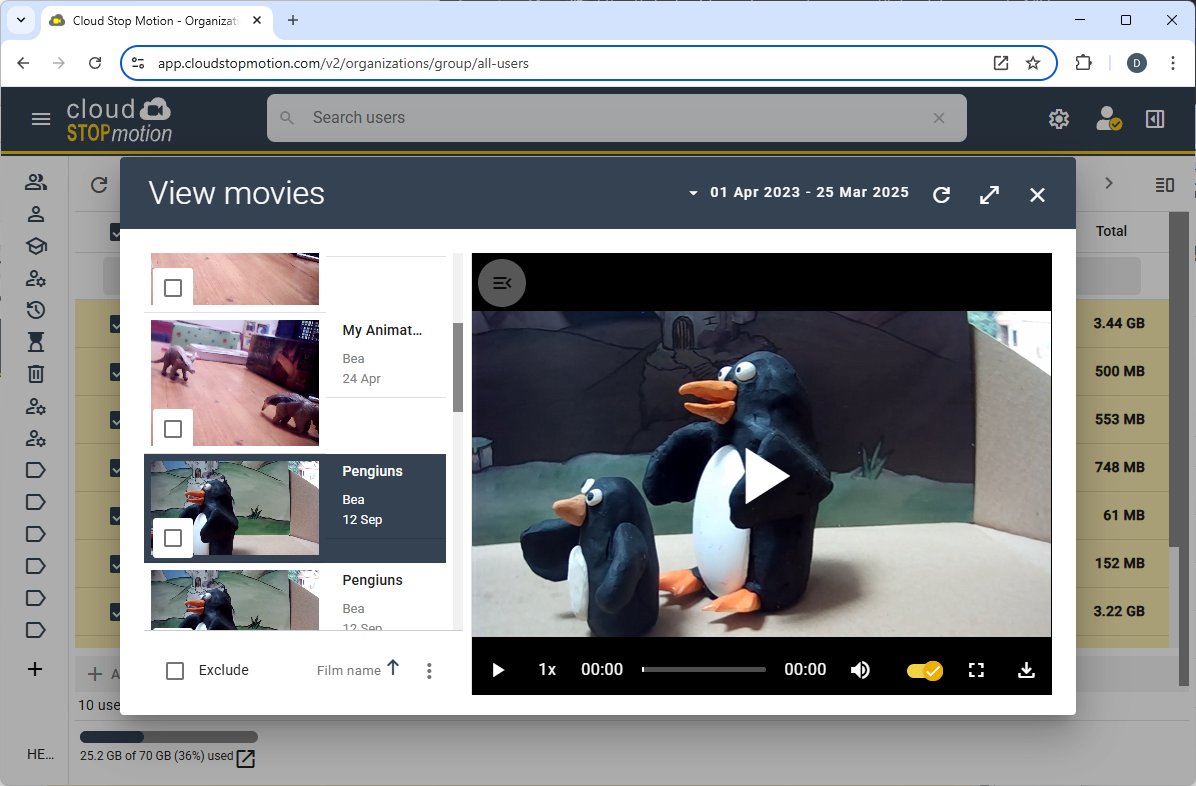
6. Viewing Exported Movies
From the console, you can view all exported MP4 movies from your organization.
Features:
-
Filter by group and time period
-
Watch all movies as a playlist
This is perfect for end-of-class reviews, showcasing work, or assessing progress.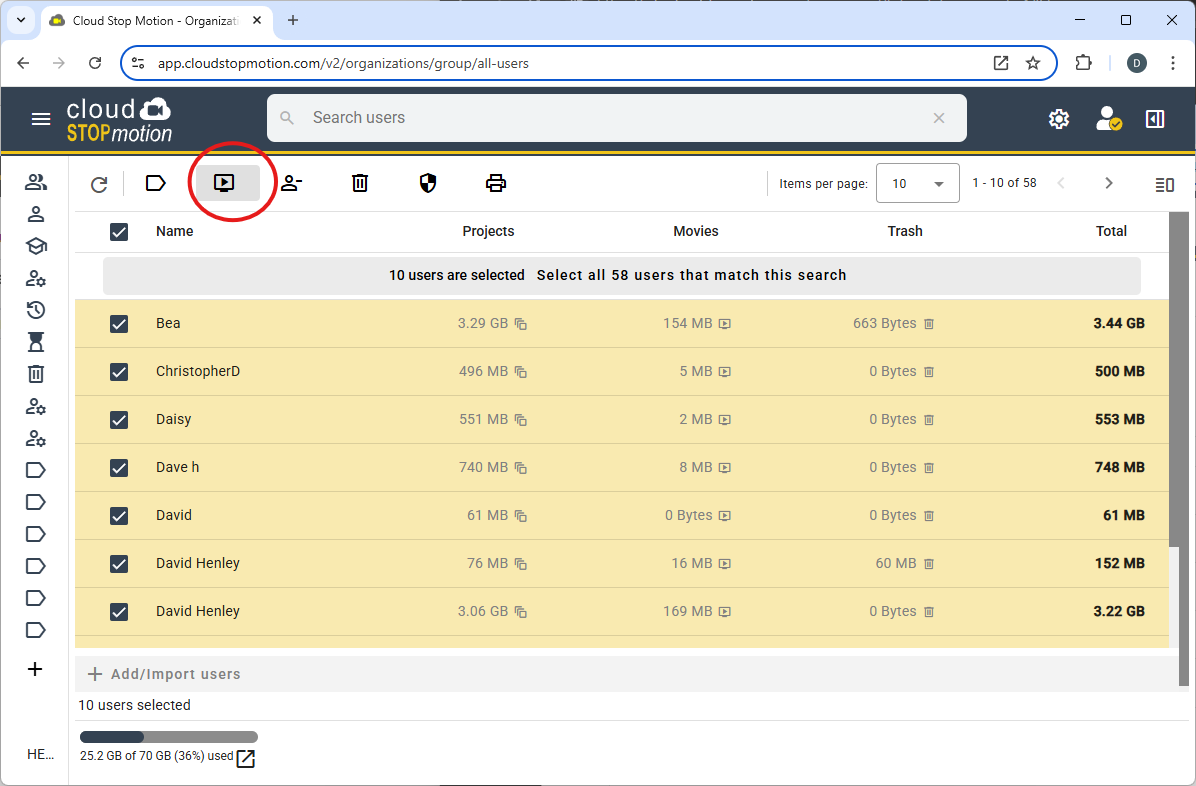
7. Monitoring Storage Usage
The Organization Console displays:
-
Total cloud storage used
-
Per-user breakdown
-
Warnings when nearing your plan’s limit
Helps you manage space or plan upgrades effectively.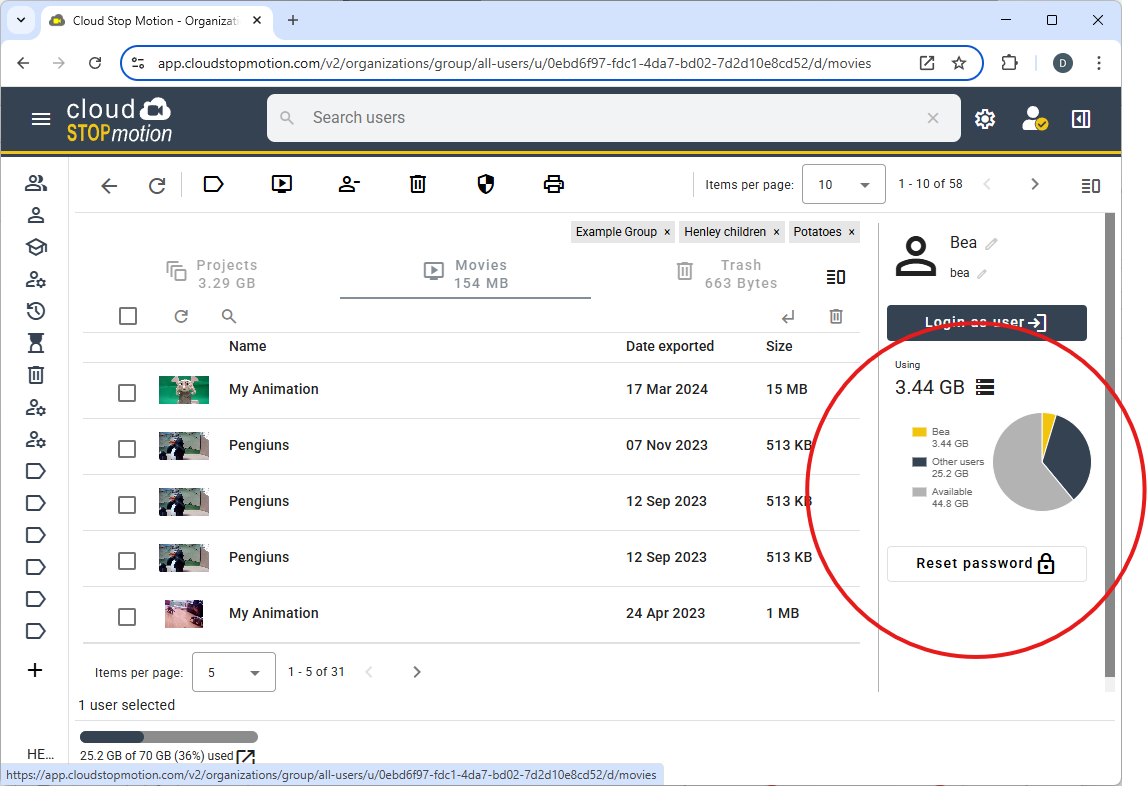
8. Managing Your Subscription
If you need to pay via invoice: Can I purchase a plan with a Purchase Order?
Need a W-9 form? Where can I find your W9 form?
Within the console, you can:
-
View current plan details
-
Upgrade or renew
-
Choose to pay by card or Purchase Order/Invoice
Check current pricing: CSM Education Pricing Calculator
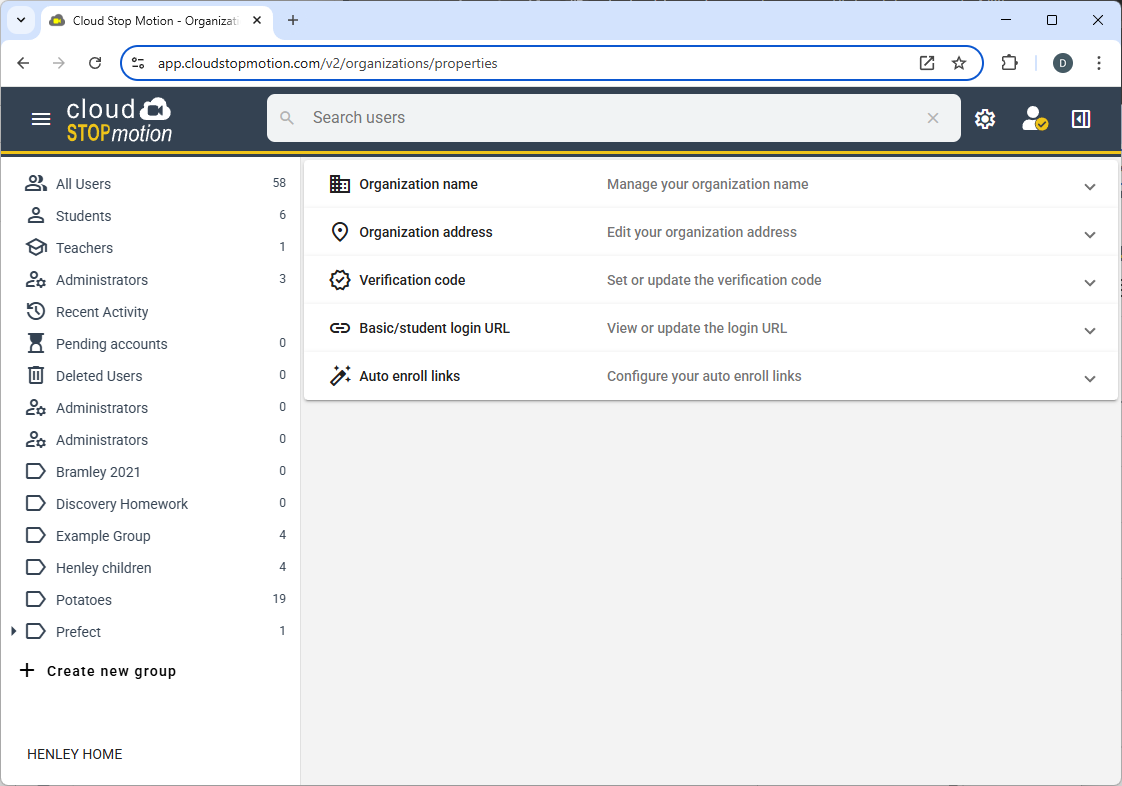
9. Customizing Organization Settings
You can configure these settings in the Organization Console:
-
Organization Name – Appears in invites and login prompts
-
Organization Address – Admin contact info
-
Verification Code – Optional identity check for users
-
Basic/Student Login URL – For simple access (great for younger students)
-
Auto Enroll Links – Configure shared links for onboarding new users
10. Sync Manager – A Helpful Tool for Users
While not part of the Organization Console, the Sync Manager helps users track saving progress.
Students and teachers can use it to:
-
See if media has uploaded successfully
-
Identify save errors
-
Prevent loss of work due to refreshes or disconnects
If a student reports missing work, have them check the Sync Manager (top-right of the main app).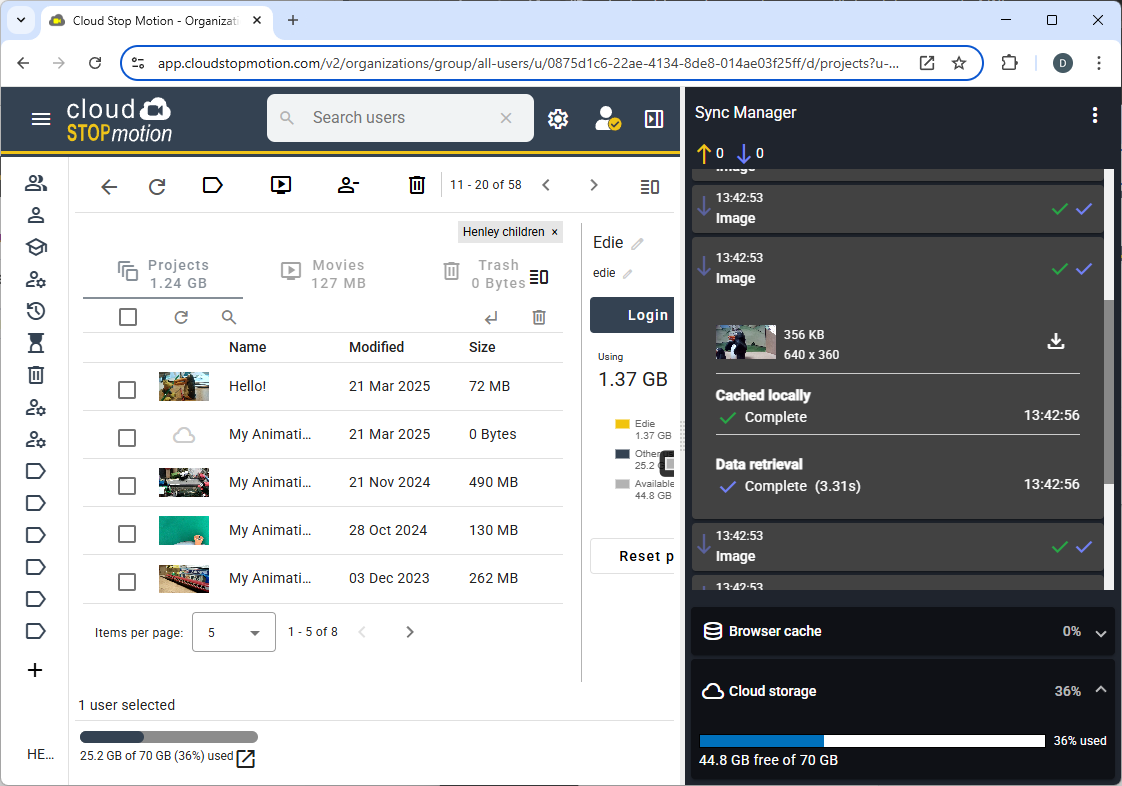
Final Tips
-
Use auto-enrol links to simplify student onboarding
-
Enable SSO for easier login across the board
-
Check storage regularly to avoid surprises
-
Encourage students to use the Sync Manager to protect their work
Need help? Contact us
Ready to explore the Organization Console? Head to Cloud Stop Motion and click your profile icon to get started.